Tutorial 8: Fun with Layers! An Intro to @JLayer
So far, we have been using Javis to create one animation at a time. This has been great and you should be proud of your Javis skills so far! However, what if I told you, there is a way to make multiple animations in one animation? 😎
And the way to do that? Layers - specifically, @JLayer's!
What Even Are Layers? And What's a @Jlayer?
A layer is a common concept used in several animation toolkits and image editing software. You can imagine layers as transparent plastic sheets with images drawn on them. When you stack the sheets on top of each other, the overall picture is formed. An example of this is shown stacking of layers is shown below:
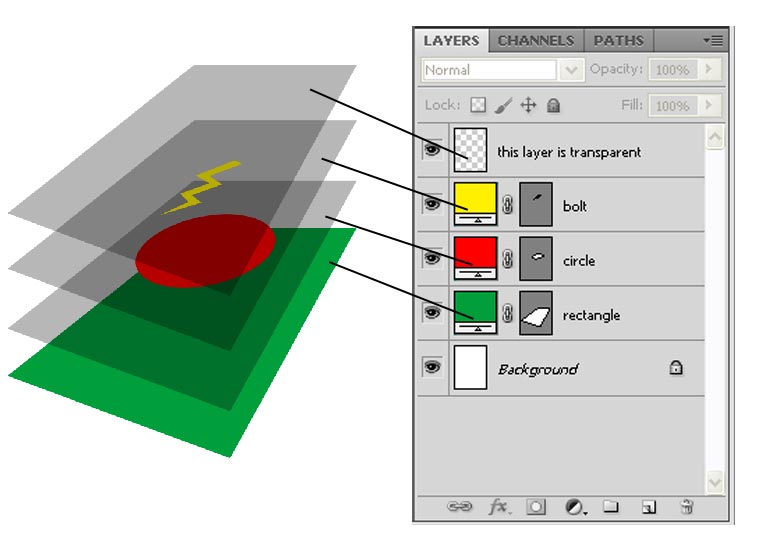
The image above comes from https://sites.google.com/a/ocdsb.ca/srishti-s-comp-tech/photoshop/important-elements and the simple explanation of layers came from here: https://learn.zoner.com/6-reasons-use-layers-photo-editing/
The goal of layers is to make it easy to divide an animation into different parts. They can then be worked on separately while the software takes care of the interactions between them. It can assist in easing the creation of complex videos or images composed of several simpler parts.
In Javis a @JLayer is the implementation of this idea, it allows you to enclose the content of an animation and to work on it - act! on it - just like on a single Object. This way we do not need to worry about all the interactions between different parts of a video by acting on them one by one. Instead we can let Javis do all that manual composition for us.
Going Back to the Basics
In Tutorial 1, we learned how to make circles go around:

For this tutorial, we are going to reuse this animation but create an artistic animation similar to the works of famous American pop artist, Andy Warhol - here is an example:
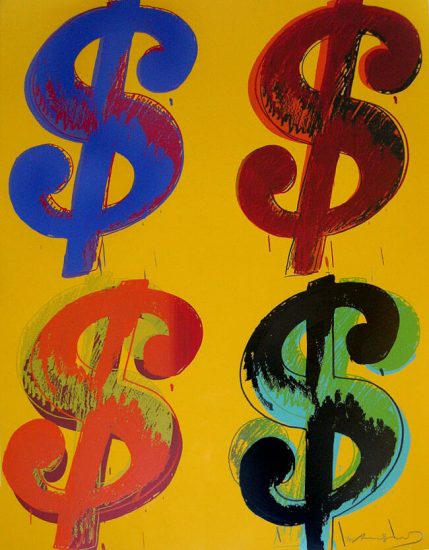
Dollar Signs by Andy Warhol
Let's Add Some Color!
First let's adjust the dancing circles animation to allow for color tweaking. As usual we start with all the functions we already defined in Tutorial 1:
using Javis

# Different from tutorial one now background in black and pen is white
function ground(args...)
    background("black") # canvas background
    sethue("white") # pen color
end

function path!(points, pos, color)
    sethue(color)
    push!(points, pos) # add pos to points
    circle.(points, 2, :fill) # draws a circle for each point using broadcasting
end
Now let's add small changes to the dancing circles to make it into a function and add arguments to choose the colors of the two circles each time.
function dancing_circles(c1, c2, start_pos = O)
    path_of_red = Point[]
    path_of_blue = Point[]

    red_ball = Object(JCircle(O, 25, color = c1, action = :fill), start_pos + (100, 0))
    act!(red_ball, Action(anim_rotate_around(2π, start_pos)))
    blue_ball = Object(JCircle(O, 25, color = c2, action = :fill), start_pos + (200, 80))
    act!(blue_ball, Action(anim_rotate_around(2π, 0.0, red_ball)))
    Object(@JShape begin
        path!(path_of_red, pos(red_ball), c1)
    end)
    Object(@JShape begin
        path!(path_of_blue, pos(blue_ball), c2)
    end)
end
Now we have all the ingredients for a colored animation where we switched the color of the moving circles.
colored_planets = Video(500, 500)
Background(1:70, ground)
dancing_circles("green", "orange")

render(colored_planets, pathname="colored_planets.gif")
This will result in the same animation but with different colors. Black has become more in vogue since Tutorial 1! 😉
Moving Our Animation with Layers
We can now use layers to move around our previous animation. First we wrap it in a @JLayer macro:
myvideo = Video(500, 500)
Background(1:140, ground)

l1 = @JLayer 1:140 begin
    dancing_circles("green", "orange")
end
Then we act! on it just like on a regular Object.
act!(l1, Action(1:1, anim_scale(0.4)))

animation_point = Point(-75, -75)
anim_back_and_forth = Animation(
		[0, 1/2, 1],
		[animation_point, -animation_point, animation_point],
		[sineio(), sineio()]
	)

act!(l1, Action(1:140, anim_back_and_forth, translate()))

render(myvideo; pathname="dancing_circles_layer.gif")
This lets you move the dancing circles animation around the video without any effort!!
Organizing Our Creation
Choose Layers Action Points
Now we try to use this idea to compose several layers in a single video, in particular we will move 4 groups of dancing circles to create an Andy Warhol style ensemble of dancing circles!
First we pick the colors for our animation and where we want each of our layers to end up at when the layers are created from the origin:
colors = [
    ["red", "green"],
    ["orange", "blue"],
    ["yellow", "purple"],
    ["greenyellow", "darkgoldenrod1"]
]

final_points = [
    Point(-150, -150),
    Point(150, -150),
    Point(150, 150),
    Point(-150, 150),
]
Initialize the Layers
Then we start the video and define our circles:
myvideo = Video(500, 500)

Background(1:140, ground)

planets = map(colors) do c
    @JLayer 1:140 begin
        dancing_circles(c...)
    end
end
Apply an Action to Each Layer
We build the animation just like before but with different endpoints for each dancing circle layer we created. We then apply a scaling action to the layers so we don't make the video overly crowded:
anim_back_and_forth = map(final_points) do point
    Animation(
        [0.0, 1/2, 1.0],
        [O, point, O],
        [sineio(), sineio()]
    )
end

for (animation, pl) in zip(anim_back_and_forth, planets)

    # Scale the layers
    act!(pl, Action(1:1, anim_scale(0.4)))

    # Move them around
    act!(pl, Action(1:140, animation, translate()))
end
Voila! 🎨
Now finally, we can render this animation by running the following:
render(myvideo; pathname="tutorial_8.gif")
You are an artist!
Conclusion
To wrap up, what you learned from this tutorial is how we can use @JLayer's to compose different ideas created with Javis and join them together without needing to manage each individual component of layer animations. This adds a whole new layer (😃) of composability over Javis enabling entirely new approaches to creating complex animations with Javis! Go forth and create!
Full Code
using Javis
using Animations

function ground(args...)
    background("black") # canvas background
    sethue("white") # pen color
end

function path!(points, pos, color)
    sethue(color)
    push!(points, pos) # add pos to points
    circle.(points, 2, :fill) # draws a circle for each point using broadcasting
end

function dancing_circles(c1, c2, start_pos = O)
    path_of_red = Point[]
    path_of_blue = Point[]

    red_ball = Object(JCircle(O, 25, color = c1, action = :fill), start_pos + (100, 0))
    act!(red_ball, Action(anim_rotate_around(2π, start_pos)))
    blue_ball = Object(JCircle(O, 25, color = c2, action = :fill), start_pos + (200, 80))
    act!(blue_ball, Action(anim_rotate_around(2π, 0.0, red_ball)))
    Object(@JShape begin
        path!(path_of_red, pos(red_ball), c1)
    end)
    Object(@JShape begin
        path!(path_of_blue, pos(blue_ball), c2)
    end)
end

finalvideo = Video(500, 500)

Background(1:140, ground)

colors = [
    ["red", "green"],
    ["orange", "blue"],
    ["yellow", "purple"],
    ["greenyellow", "darkgoldenrod1"],
]

final_points = [Point(-150, -150), Point(150, -150), Point(150, 150), Point(-150, 150)]

planets = map(colors) do c
    @JLayer 1:140 begin
        dancing_circles(c...)
    end
end

anim_back_and_forth = map(final_points) do point
    Animation([0.0, 1 / 2, 1.0], [O, point, O], [sineio(), sineio()])
end

for (animation, pl) in zip(anim_back_and_forth, planets)

    # Scale the layers
    act!(pl, Action(1:1, anim_scale(0.4)))

    # Move them around
    act!(pl, Action(1:140, animation, translate()))
end

render(finalvideo; pathname = "tutoral_8.gif")
Author(s): @gpucce, Jacob Zelko
Date: September 12th, 2021
Tag(s): layers, art